WWW.HappyNScrappin.com

Thursday, November 15, 2012

Celebrate using Fancy Pants Country Boutique Wedding

Hi Happy N Scrappin' friends! Sorry you haven't seen much of me recently, but I've been creating and just working on various projects! We are preparing for the holiday's around here so things are starting to pick up both at work and home. What about you? Are you already getting set up for the holidays? 

Today I have a card to share that I made using Fancy Pants Country Boutique Wedding Kit. 

Since this is a wedding themed kit, I thought I would make a card that could be used for a wedding, or wedding shower. It is in the classic black & white, but has some bling as well. 


Distress Stain in Vintage Photo was used on all the edges of my papers to emphasize them. 

Thanks a bunch for stopping by! I will see you next week with another project featuring this wonderful collection! 


Saturday, October 27, 2012

Halloween Treat Bags

Happy Saturday friends! I hope you are all enjoying your weekend. I know I am. I have some treat bags to show you today that I created  using products from the store

These bags were a lot of fun to make. The bags I get from work. They are rejects from the stampers who stamp the brand image on them by hand.  Rather than them end up in the garbage, I take them home and use them for projects such as this! They also make fantastic banners. :) 

To color the bags, I used Shimmerz paints. I dumped a portion of my paint container in the color I wanted in a zip lock bag and added water to it. I threw the bag in the bag and closed it.  To get the bag fully colored I rolled and squeezed the baggie until my fabric bag was entirely colored. I learned this technique for coloring bags from the super sweet Kendra Sand. Go HERE for the tutorial. 


After both of my bags were covered with Shimmerz and had dried, it was time to decorate them. I used some of the MME Lost & Found Halloween Collection to decorate one of the bags and some Doodle Twine by Doodlebug for the other along with some acrylic paint, Faber Castell markers and more Shimmerz.


My ghosts were painted on by me. I rarely paint actual images, but I figured it would be hard to mess up painting ghosts.... right? :) 


I hope you've enjoyed my treat bags, and hope that you all have a Happy Halloween this year. Don't eat too much candy!! 


Click any of the images below to take you to the products from the store used in today's project. 

Thursday, October 11, 2012

MME Lost & Found Halloween Cards

Good morning Happy N Scrappin' lovers! How have you all been? Are you enjoying your October thus far? How about this week? It's almost over... hooray! At least the work week for most of us anyway. :) 

Today I have two cards I made using My Mind's Eye's Lost & Found Halloween Collection. This collection has a vintage feel to it, which I love. Think apothecary, tonics, elixirs and poison bottles. That's what I see when I look at this collection. It reminds me a lot of the bottles and inspiration where I work. 


For this first card I created a broom stick out of a strip of some of the patterned paper and a river reed from a scent diffuser set that the company I work for makes. They make great mini broomsticks! I used some distress ink along with alcohol ink to color it like a broom. Some Doodlebug Doodle Twine was used at the top of the broom bristles. I plan on making a bunch more of these to use on a banner I plan on making. 

The second card is even more simple, with one patterned paper being the majority of the card with only a strip of solid cardstock at the bottom. The orange die cut with words is from the punch outs included in the Collection Kit. 

Below are the two cards together. I hope they make someone happy when I send them. :) 

Remember that there are lots of other new collections by My Mind's Eye available in the store, so be sure to check them out!! 


Wednesday, October 10, 2012

Imaginisce Clicut


So have you been wondering what to do with our Clicut Retractable Pen Knife

This fabulous project is from Imaginisce designer, Diana Fisher.

*******

She used the Clicut tool to create the Lego blocks on this layout.

SUPPLIES: Imaginisce Clicut, self-healing mat, ruler; 

Imaginisce Sole Sisters and Makin' Waves pattern paper;

 card stock, foam pop dots adhesive


Find all your favorite IMAGINISCE products at 

HAPPY N SCRAPPIN


Saturday, October 6, 2012

Apple Cider from Bo Bunny

we love the BO BUNNY designers and continue to be inspired by them
We love this card created by BO BUNNY designer Robbie Herring
Supplies Used:
Patterned Paper: Apple Cider Dot and Apple Cider Cut Outs
Double Dot: Chocolate Dot

Brads: Apple Cider

Petals: Apple Cider
Ribbon: Double Dot Chocolate

over at 
HAPPY N SCRAPPIN

and better yet it is on sale right now -  15% off !!!!


Don't forget to make sure you have plenty of adhesive - the POGO is perfect for cards

Imaginisce POGO Adhesive Dispenser
This press down applicator places a single circle of adhesive onto your project. Just click and stick without having to touch any sticky surface.
*250 7mm dots
*Precise Application
*Click & Stick Action
*Click, Stick, Repeat!

Monday, October 1, 2012

Halloween Cupcake Stand featuring WE R MEMORY KEEPERS


Take a look at this super cute cupcake stand designed by our friend Ann Corbiere-Scott

It features WE R MEMORY KEEPERS new
BLACK WIDOW collection


Ann created these super cute cupcake holders with the brand new


you can print STEP BY STEP instructions for this project HERE


Friday, September 21, 2012

Spooky Bottles using MME's Lost & Found Halloween

Good morning and Happy Friday! Emily here with some bottles that I altered using My Mind's Eye's Lost & Found Halloween Collection. I had a blast working with the collection and these bottles. It was actually a pretty simple project! 

The bottles are reused from products I had in my house... the glass milk bottle is from some bath salts, and the smaller bottle held my diffuser oil and reeds until it ran out. I can't stand to throw things away, so I reused them for Halloween decorations! 


I used alcohol inks to color the bottles. After the bottles were cleaned and dried, I squirted a little bit of alcohol ink in each of them, closed the tops and shook it up until the ink covered every last inch of the insides of the bottles. 

The milk bottle was harder to get coverage on... I don't think I used enough ink to begin with. I plan on going over this one again. 

After the insides of the bottles were covered, I dumped out any remaining ink and then let the bottles dry upside down. 


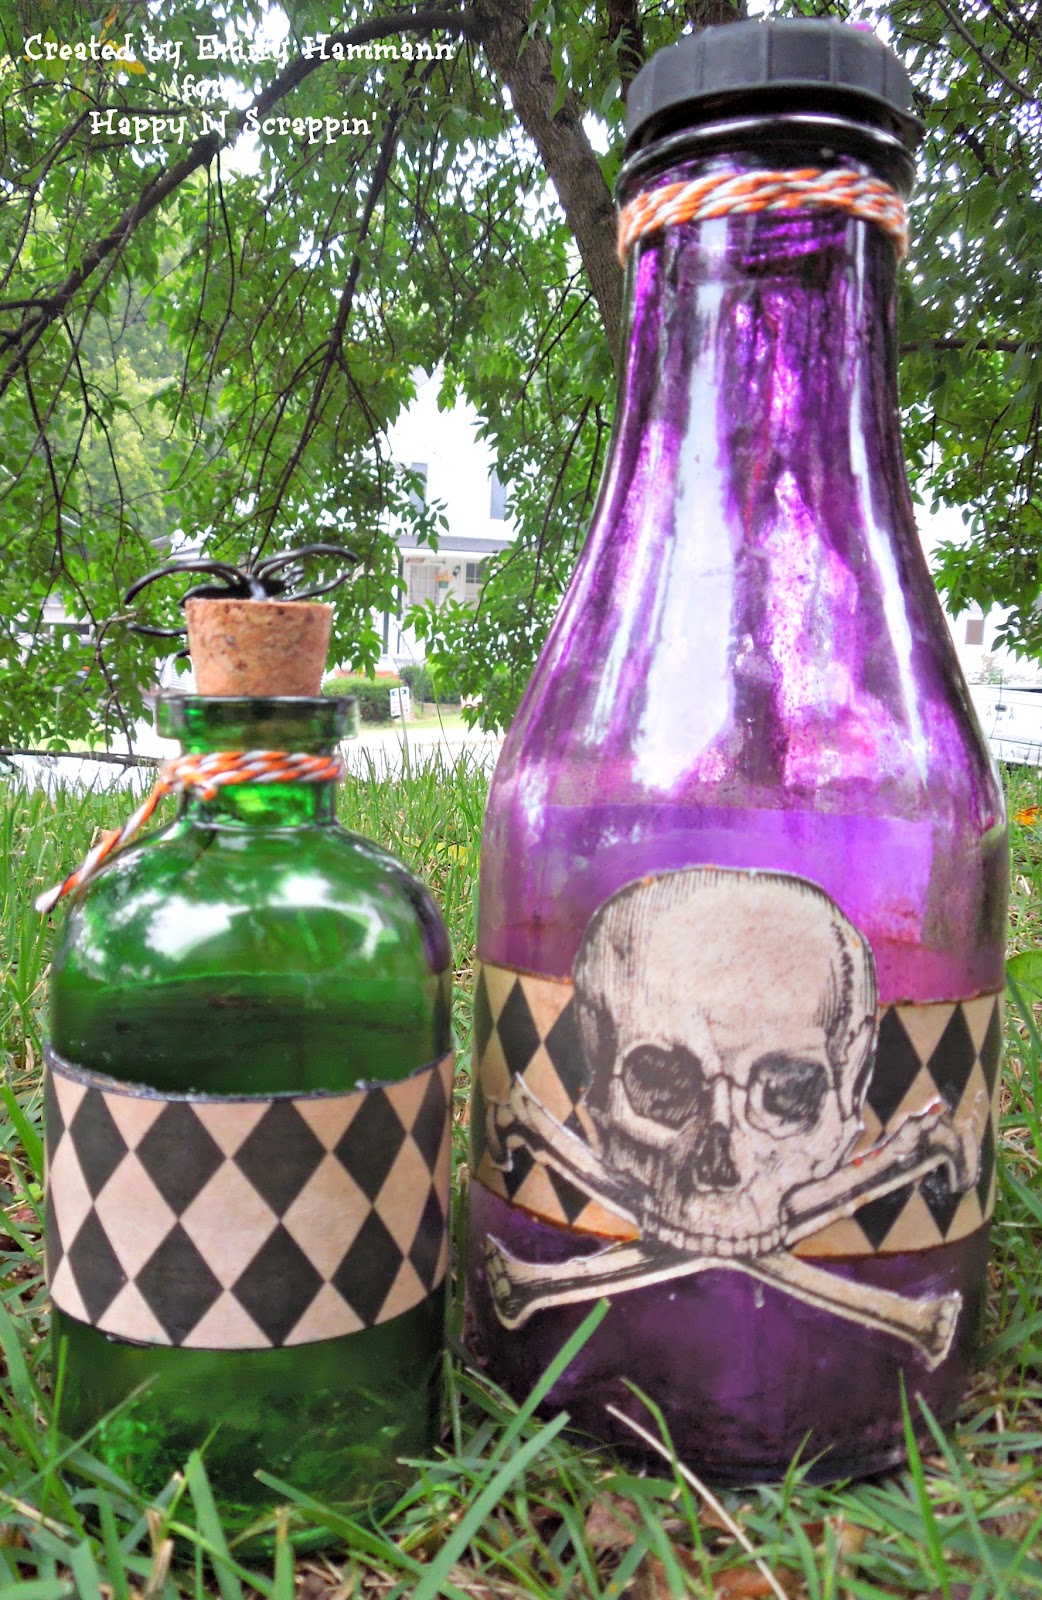
Here is the back of my milk bottle. I cut out the skull from one of the papers in my kit and Mod Podged it to the backside of my bottle. I used Rock Candy Crackle Paint over it. When the paint had dried I used Distress Ink in the cracks so that it would look more like a real skull.


It looked pretty good when it was finished.... 

This second bottle was colored the same way. I had a cork for this one that fit the top, so I used it to close it. I wish I had a large enough cork for my milk bottle, but I didn't, so I used acrylic paint to color the lid on it. 


I added Doodlebug Twine to the top of both bottles when they were finished. The spiders were another touch I added when the bottles were complete. My kids had them leftover from last Halloween, and I thought they would look cute on the bottles. :) 

The final products.... 


Thanks so much for stopping by to see this latest project.... I have more Halloween projects to share with you using this same collection that I will be sharing next week!! 

Click on any of the images below to take you to the products from the store used in today's project!